Labels

Showing posts with label Projects. Show all posts

Wednesday, May 29, 2013

Church Chairs

I have a huge foyer and nothing ever fills up the space. For a few years I have been looking for an antique church pew. I have come across a few but nothing ever jumped out at me or they were way out of my price range.  A few months back while driving through town I saw these church chairs at a yard sale.  I had to stop.  I bought these solid oak chairs for $60. Even though they were covered in a red 70's corduroy I had to have them.


Well after alot of thought I knew that I wanted the chairs black but still wanted to see the oak grain. I chose a ebony stain. Not knowing if these had be stained with oil or water based we had to sand them down to the grain, that was NOT fun but ended up being the best idea.  At first I wanted these chairs to have a classic look so I was just looking for fabrics that were formal. I started with paisleys and tulles but nothing worked.  While at my fourth fabric store I started to leave frustrated and deflated when I came across this super fun and funky fabric.  I knew that I had to have this on my chairs.  So the end result ended up being the opposite that I had started with.

Sunday, March 10, 2013

Burlap

I am a bargain queen and I love to search the clearance bins in my local craft stores. When I came across 100' of 8" burlap for $1 I was super excited.  Now what shall I do with it?
I made a few medium sized wreaths with flowers from my craft hoarding bins.  I still had 8' of burlap left so.....
I decided to make two card holders.  I again used clearance flowers and mini clothes pins.


Sunday, August 26, 2012

Baby Decorative Canvas

I love Pinterest for so many reasons and one of those reasons is that it is a great place to stalk find things that your friends are interested in.  I have a friend who is expecting a little girl soon and I have had the hardest time finding something special for her.  Well the other day I had noticed that she had posted a a canvas quote on Pinterest. 

Wow, this might be something that she would enjoy, and I know her colors so off I went to start gathering my materials.

I used a 14x11 canvas so she could hang it in a smaller area.  I painted the canvas a light beige and decided to do pink lettering and accents.  Vinyl lettering does not stick to canvas very well so I used my vinyl cutter to cut the quote, I weeded out just the letters and used it as a stencil. If you choose to use your vinyl as a stencil on canvas DO NOT paint using strokes.  Paint gets under the vinyl this way.  To keep your paint from bleeding just dab the paint.

After everything was dry I slowly removed the vinyl.  I then hot glued pink ribbon on back for a tie hanger and on the sides of the canvas to give it a finished look.

Sunday, August 12, 2012

Coffee cans...Continued


Coffee Cans turned into Classroom Box Top Containers


This is a continuation of my other post "Coffee Cans...What to do"?  Since I had a few more cans staring at me I decided to make Box Top holders for the boys' classrooms.  My school gives an ice cream party each quarter to the class who collects the most Box Tops.  Most teachers just keep them in a bag or envelope. I thought that they might appreciate something new, more sturdy, and a lot prettier.  Super easy, super cheap, and very much appreciated.


Wednesday, August 8, 2012

Coffee Cans....What to do?

We love coffee in my house so I am always stuck with empty coffee cans.  I hate to just toss them in the trash so I end up saving them.  I was looking in my pantry when a box of cans came falling down on my head.  At that point I knew I had to do something ASAP. What do you do with coffee cans?


After searching for a few ideas I decided on a craft room must.  I don't know about you but all of my craft supplies are in drawers, most things fit perfectly but some need their own space.  My markers, paint pens, and scissors need to be somewhere easy to get to.  I decided to use some color coordinated scrap paper to cover the cans.  The size cans that I have are a little bigger than the paper so I had about 1/4 inch space.  I used this space to apply the hot glue.


After I measured the paper and glued the cans together.  NOTE: Because of the cans' lip you need to your hot glue thick. 


I have seen others do this but with many cans. My space is limited so three were perfect for me.


Now I have two more cans left so I think that the boys will be taking one to their teacher for a perfect place to store the class boxtops. This time I will be able to use the lid.  I will just cut a slit in it for easy insert.

Monday, July 23, 2012

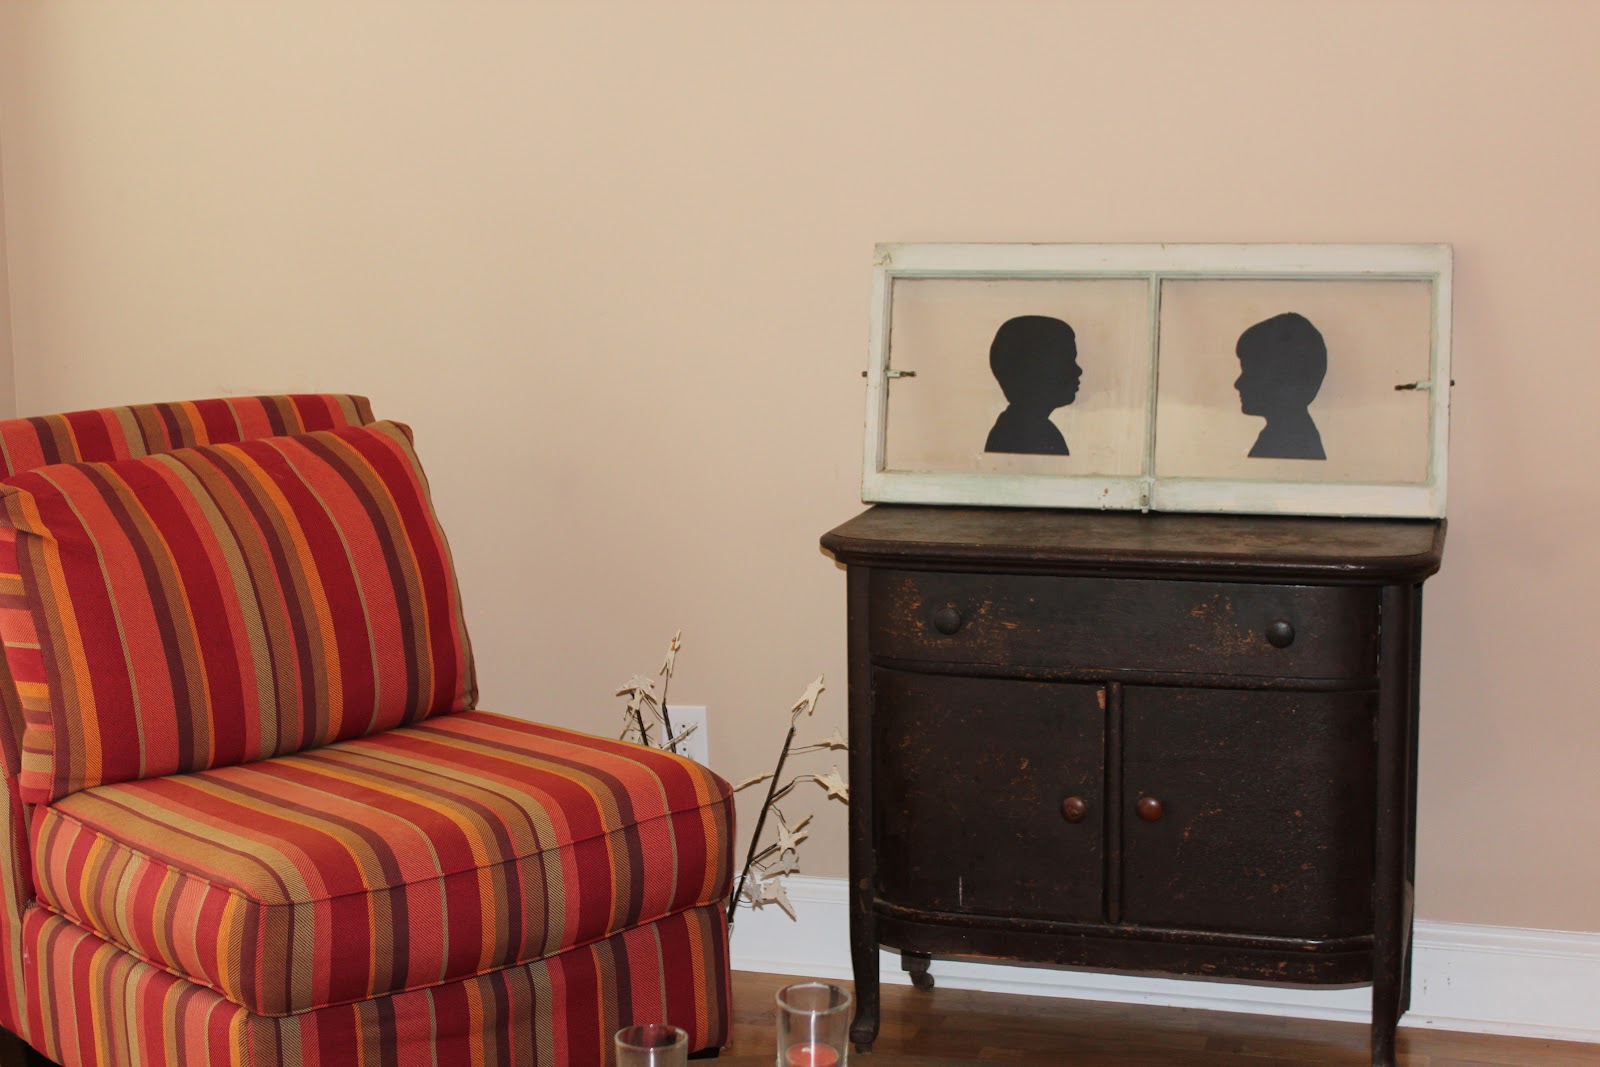
Silhouette Window Wall Art

I am a nut for old, dingy, and distressed accent pieces.  I love to incorporate old and new together to get a one of a kind eclectic look.  One of my faves would be old, shabby, and distressed windows as wall art.  Well while scanning through a local Antique Market (Red Hound Antiques), I came across the perfect window in the perfect color.  Honestly the only thing that I had to do was clean the glass and figure the perfect thing to do with it.  I love when projects become so easy.  Well after cleaning the glass and looking at it a few days I had an idea.  I have seen canvases and wall art with shadow silhouettes as the center art.  I love that idea soooo...I decided to use my sweet boys' perfect heads as my inspiration. 


Using my Canon and Photoshop I had the perfect side silhouettes of my boys.  I then sent the pics to my vinyl plotter and cut them out.  I was going to use the cutout as a guide to paint....painting did not turn out the way that I wanted so I then used the inside of the cutout as the decal.....PERFECT!! 

As you can see I have paired it with another shabby piece that I have collected.  I am still looking for the perfect knobs for the cabinet.  I am also going to hang the window piece about 2 ft from the cabinet.

The window itself is a light green.

The same green in the stripes of the chair.